Hi! Customization is a matter of more than just adding shapes and colors. Indeed, it also involves the possibility of adding or replacing options that enhance the work. Consequently, today, we will see how to customize the send to menu in Windows 10. This menu allows you to send files to certain applications or locations on the system. Indeed, we will be able to print a file more quickly. Or simply export it in a couple of clicks.
Steps to customize the “send to” menu in Windows 10.
This is an option found in the context menu of Windows 10. As we mentioned, its purpose is to provide quick actions to move or export files. Indeed, from this menu, we could send an image immediately to the printer. In the same way, we could move a set of files quickly. This is very useful if we frequently work with several files. Then we would facilitate the task with just a couple of clicks. Let’s see how to do it. To start the process, please press the Win+R combination. As a result, the Run menu will be displayed. Next, run the following command:
shell:sendto

A Windows Explorer window will be displayed immediately. Consequently, you will see all the accesses associated with the Send to menu.

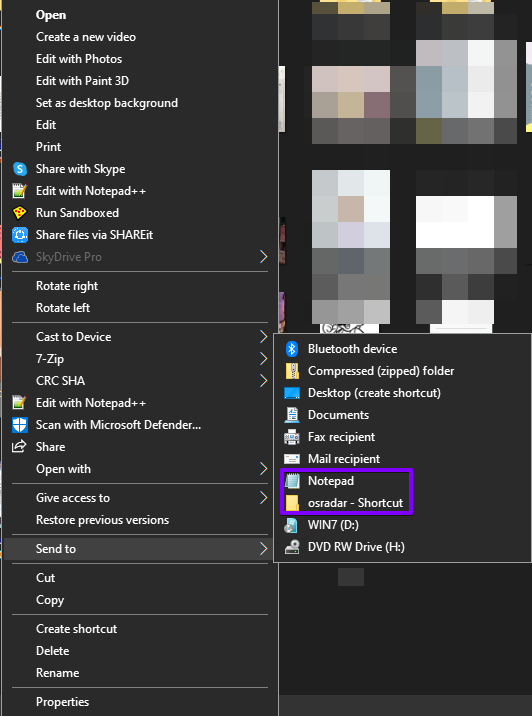
From now on, you can customize it to your liking. First, it is convenient to clean it of useless options. That is to say, to eliminate those options that we hardly use. It is also interesting to add new applications or locations to this menu. With this in mind, just create a shortcut on the desktop and then paste it into the folder. Suppose you want to add a couple of items to this menu. Let’s say the notepad and a certain folder. In that case, you just have to create a shortcut to the two items.

Then, you just have to move them to the folder we opened earlier. From now on, these items will appear in the Send to menu. In fact, just try using the context menu.

Okay, so we learned how to customize the send to menu in Windows 10. As you can see, it is a simple process. However, it is a good way to optimize productivity. See you later!


