Hi! Today, we’ll show you some great features to get the most out of Gmail. Specifically, we will talk about the web version of this email. Despite having been with us for many years, Gmail always surprises us with new and great features. In addition, this post is aimed at novice users so that they can have a complete working guide. However, those experienced users can also get some interesting info. Let’s not wait any longer, let’s see some great features to get the most out of Gmail.
Choose the design of your inbox
The first step in configuring Gmail to your liking is to customize the inbox. With this in mind, you need to go to the settings. Just click on the cogwheel icon. Consequently, you will see the available configuration options:
- Density: Makes the rows of Gmail items more or less close together. So, you can choose to have everything a little closer together, so you can see more emails in the window. You can also separate it for a cleaner look.
- Inbox type: There are several inbox layouts depending on your needs. In addition to the default, you can have items such as priority items or unread mail appear at the top.
- Reading panel: It is possible to divide the screen into two sides. Consequently, on one side you will have the emails and on the other side the content of the email you click on. You can deactivate this, which is the default setting, or select to split the screen horizontally or vertically.
- Email threading: If this option is enabled, emails sharing the same subject will be grouped together.

Choose a custom theme
With this option you can choose a theme to customize your Gmail page, as well as its wallpaper. Moreover, it is in the same menu. After clicking there, you can decide a theme from one of the wallpaper photos that Gmail offers you. If you want, you have a My Photos button to pick a photo you have on your computer.

Customize the inbox
If you use the default layout, then you have a Customize button to define which tabs you want to appear at the top so that you can easily navigate between the different types of mail. You will then enter a screen where you can choose what to enable and what to disable.

In this section you can choose from the predefined tabs, and you can add or remove several others to your inbox. You also have an option to have all highlighted messages automatically appear in the main tab. Finally, there is an option to delete all the tabs.
Mark the highlighted e-mails
Let’s be honest, a chaotic and cluttered inbox can be very annoying. As a result, it is possible to lose priority e-mails in the midst of all this clutter. Fortunately, Gmail allows you to label emails as featured. Natively, Gmail defines this option as starred mails. Consequently, it assigns a button on the left side of each email. However, the simplest option is to select the email and then check the star icon.

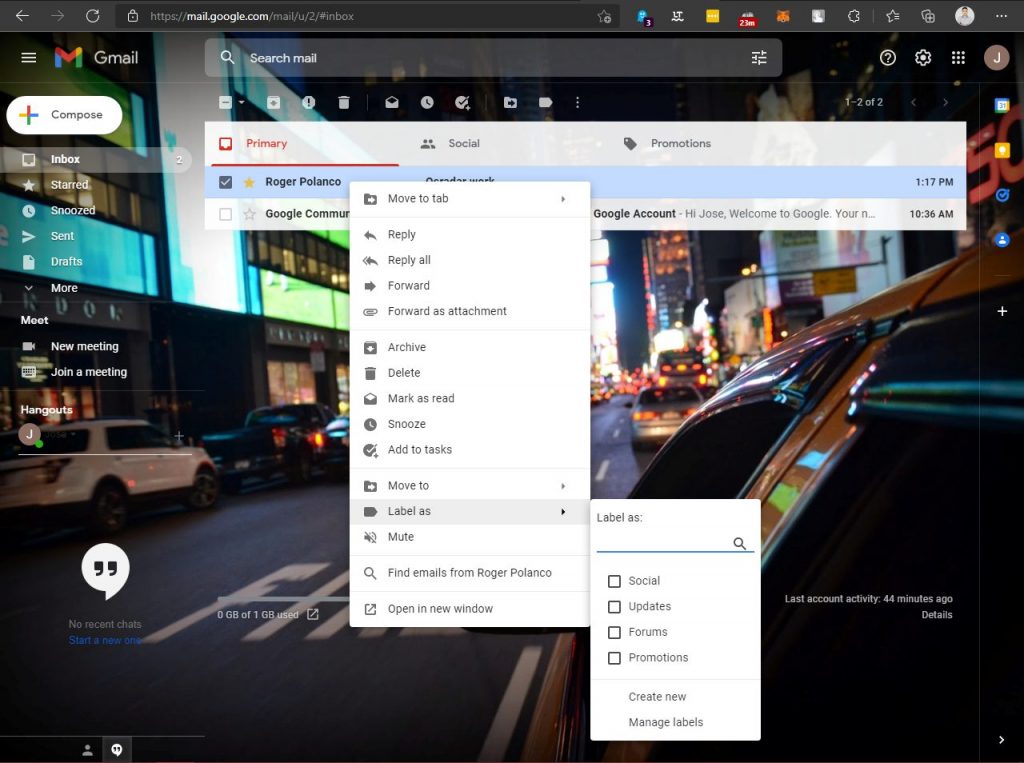
Optimize mailings by assigning a label to them
In accordance with the previous system, Gmail implements a label system. To do so, it uses the creation of labels to manually or automatically classify messages. With this in mind, please follow the path below: Settings>See all settings. Consequently, we will see the configuration screen. Now just click on the Labels tab. You will see all the labels pre-generated by Gmail, but underneath you will have the option to create new ones. When you click on it, you will only have to give it a name and, if you want it to belong to another one, activate the option Create new label: and choose which one.

We can also create some kind of sub-labels. So, let’s say we create one called Personal, then you can have several within that category such as Family, Projects or whatever you want. However, if what you want is to have a main tag, then you should not create anything additional. Just choose the name and start labeling the emails.

Filters to automate tasks
Gmail filters are a kind of commands that are executed when an email arrives that responds to some previously configured characteristics. For example, we can establish that every time an email arrives from a family member, then the Personal label is automatically set. This action can be done from the Filters and Blocked Addresses tab of the Gmail settings menu.

After clicking on Create filter, a new window opens to configure it to your liking. You can use an email sender, a recipient, or a subject. In addition, you can run on e-mails that have attachments or contain keywords. These would be the cases or criteria, and after setting them, you can choose the option to create a filter. Then you will go to the screen where you can configure what you want Gmail to do when you receive an email with the characteristics you have pointed out before. Actually, this is one of the best options to get the most out of Gmail.
Block users or send them to spam
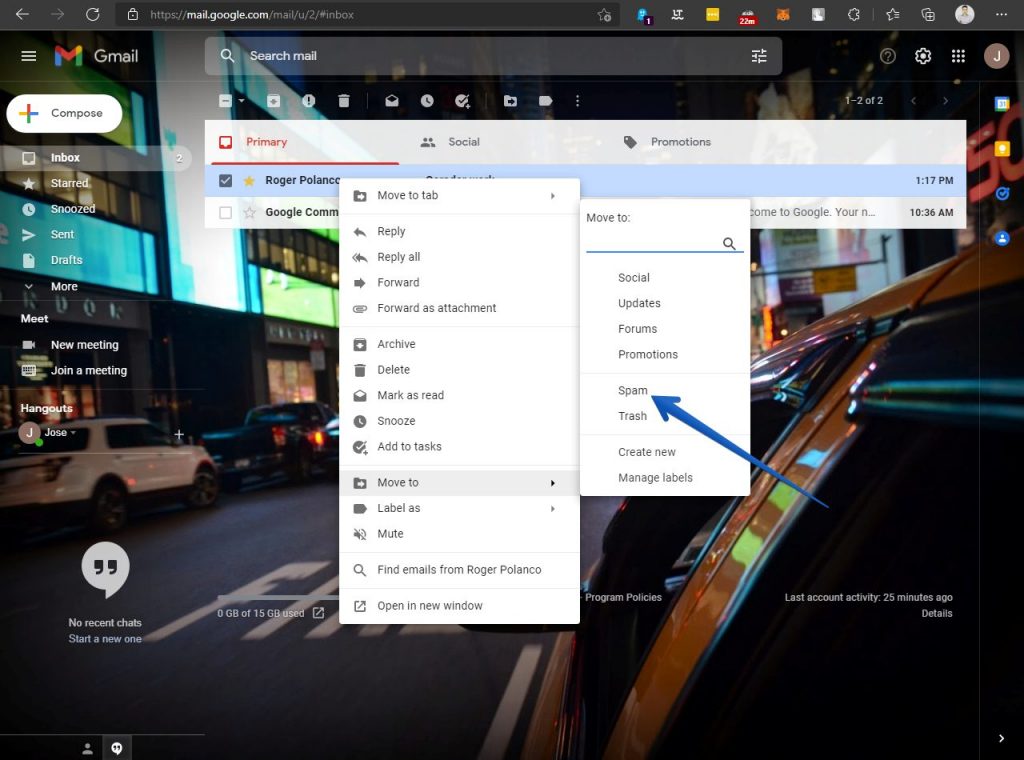
Google’s algorithm works very well. Indeed, Gmail usually automatically detects most spam emails. However, a sender may be particularly annoying, and therefore you want to put it in that category. Here we can proceed in two different ways. First, we can send the email directly to the Spam folder. With this in mind, right-click on the email, go to Move to, and choose the Spam folder.

There is also another way to proceed, although this is more radical. In effect, we will be able to block a sender completely. This way, you will not receive any more emails from this person. With this intention, open the email and in the option to reply, please click on the 3 dots and choose block.

Ultimately, we’ve seen some great features to get the most out of Gmail. Bye!


