Hello! Do you want to know the speed of your Internet connection at all times? This is possible by installing a tool like netspeedmonitor. Consequently, today we will unravel all the information about this type of utilities. Indeed, we will try to be as didactic as possible. Specifically, we will talk about 4 utilities used to monitor network speed in Windows. The first two are tools developed by third parties. The other two come integrated in the system. Anyway, we will see how to access them and get the most out of them for the system. However, first we will go deeper into the term needspeedmonitor. Then we will see how to monitor network speed in Windows.
What is a netspeedmonitor, and what is it for?
As its name suggests, netspeedmonitor is a tool that allows you to check the network speed of a specific connection. That is, a tool that shows at what speed the data sent and received by the network adapter is being transmitted. Obviously, this technology does not refer to a physical meter. It is actually a software that measures Internet connection statistics. There are many tools that monitor the network in real time. Fortunately, some of them are free:
- Net Speed Meter. Free software available in the Windows 10 application store, the Microsoft Store.
- DU Meter. A utility for viewing network speed at all times from various points on the screen. It is paid, but has a 30-day trial period.

Windows also has its tools to check the network speed:
- Task Manager: The utility integrated in Windows 11 that allows you to consult practically all the performance statistics, including network statistics, on your computer.
- Resource Monitor: Another application integrated in the operating system for which you will not have to spend a single euro. Its appearance is somewhat archaic.
How to install a monitor network speed in Windows
We have already explained what a network speed monitor is. Next we will see some alternatives to be installed in Windows.
Net Speed Meter
Net Speed Meter is a tool that you can get directly from the app store. With it, you will be able to activate the network speed monitor in a few clicks. To install it, just go to the Microsoft Store. From there, just enter the term Net Speed Meter, alternatively you can click directly on this link. Accordingly, just click on the Get button. You will immediately be redirected to the Microsoft Store.

Once inside the store, once again click on Get. Then wait for the application to download and install. Now, click on Open to launch the application.

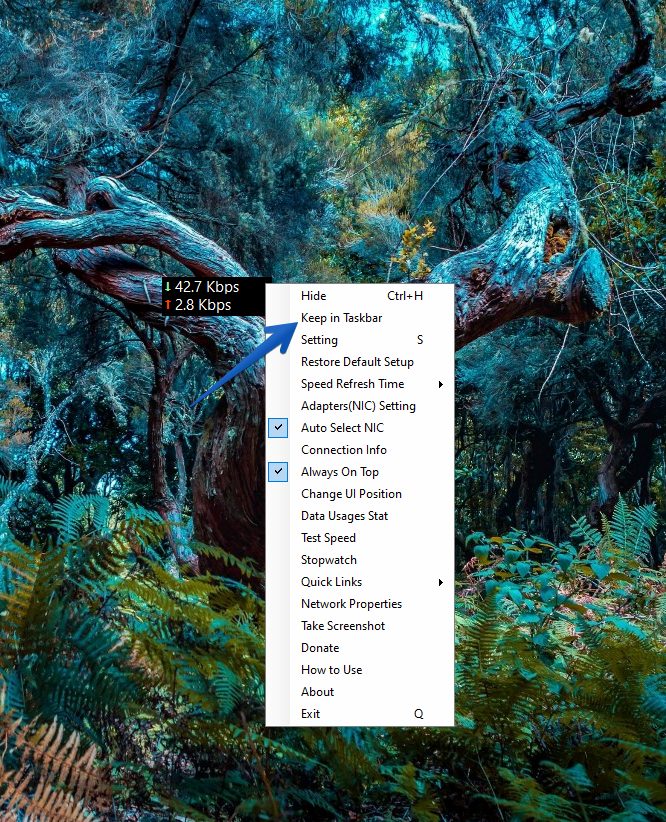
A black background box showing the data rate is displayed on the desktop. The green downward arrow refers to the download speed. On the other hand, the red up arrow indicates the data sending or uploading rate. You can leave Net Speed Meter in the desktop area, if you prefer. However, just drag it to any preferred location. It is also possible to pin it to the taskbar. With this in mind, right-click on the box and select Keep on taskbar.

As a result, the monitor is moved to the taskbar. However, you should be aware that it is not locked, so it can still be moved freely.

Additional Net Speed Monitor options
Net Speed Monitor has other interesting options. Just right click to check them out. For example, you can measure the total connection speed. With this in mind, click on Test Speed.

You will immediately see the panel ready to measure the network speed.

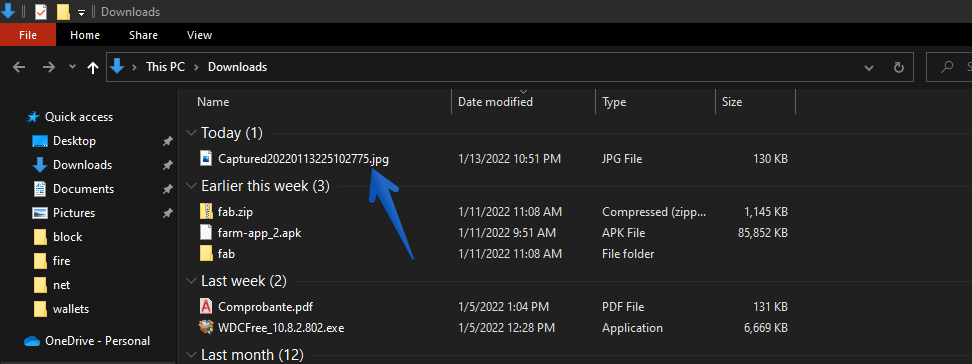
Another option is to take a screenshot to save the network speed statistics. Again, all you have to do is open the context menu and select the Take Screenshot option.

The Downloads’ directory will open immediately. This is where the screenshot is saved.

Du Meter
Du Meter is another alternative to check network bandwidth usage. Just download it from here.

After downloading, just install it like any other Windows program. Just follow the instructions in the wizard, and you are ready to go.

When you launch it for the first time, a wizard is displayed to better configure the application. The most striking features of the app are also listed.

Please click next to check the different functions.

It is also possible to set a warning in case your provider gives you a maximum of megabytes of navigation.

Finally, we will be ready to launch the program.

In the lower-right corner of the screen, you will now have a netspeedmonitor in Windows. By clicking on it, you can select whether you want to see the graph of the speed of the Internet, the local network or the programs.

Using the task manager.
The task manager serves multiple functions. One of them is to monitor the Windows network connection speed. With this in mind, press the Control+Shift+Esc combination to open it. Once there, click on the Performance tab. Next, scroll down and click on the currently active connection. You will then see the current status of the network connection speed.

Resource monitor
The last option we propose to measure the speed of the network connection in Windows is through the Resource Monitor. There are many ways to open it, however one of the easiest is from the Task Manager itself. Specifically, from the Performance tab.

Next, you need to expand the Network tab. From there you will see the network statistics. The design is a bit clumsy, but fully functional.

Very well, in this way we have seen how to monitor network speed in Windows. As you can see, we explore different possibilities. That is, with third-party solutions and with Windows own tools as well. See you later!


