Developing web applications is usually related to PHP frameworks. However, Python, which is a very versatile programming language, also has a framework that allows you to do it. And in fact, it is quite efficient. So, if you like Python and you think it is convenient to develop web applications with this language, then you should know Django. In this post, you will learn how to install Django on Ubuntu 20.04. Besides that, I will tell you a little about this framework.
Briefly, What is Django?
The Django is a framework written in python to develop web applications. It respects the design pattern Model – View -Template and focuses on making applications quickly and under the focus of DRY (Don’t repeat yourself).
It is incredibly popular and great websites are created with this Framework. So, let’s go for it.
Install Django on Ubuntu 20.04
1) Install Python and PIP3 on Ubuntu 20.04
Django is a framework created in Python. Therefore, you need to install Python but also PIP. With PIP we will do the installation.
:~$ sudo apt install python3 python3-pip
Reading package lists… Done
Building dependency tree
Reading state information… Done
python3 is already the newest version (3.8.2-0ubuntu2).
python3 set to manually installed.
The following additional packages will be installed:
libexpat1-dev libpython3-dev libpython3.8 libpython3.8-dev libpython3.8-minimal libpython3.8-stdlib python-pip-whl python3-dev python3-wheel python3.8 python3.8-dev
python3.8-minimal zlib1g-dev
Suggested packages:
python3.8-venv python3.8-doc binfmt-support
The following NEW packages will be installed:
libexpat1-dev libpython3-dev libpython3.8-dev python-pip-whl python3-dev python3-pip python3-wheel python3.8-dev zlib1g-dev
The following packages will be upgraded:
libpython3.8 libpython3.8-minimal libpython3.8-stdlib python3.8 python3.8-minimal
5 upgraded, 9 newly installed, 0 to remove and 82 not upgraded.
Need to get 13.0 MB of archives.
After this operation, 25.5 MB of additional disk space will be used.
Do you want to continue? [Y/n]

Then you can check the version of PIP that has been installed.
:~$ pip3 -V
pip 20.0.2 from /usr/lib/python3/dist-packages/pip (python 3.8)
Now we can install Django.
2.- Install Django on Ubuntu 20.04
The next step is to install Django. We will use PIP as a tool that will allow us to do the download.
:~$ sudo -H pip3 install Django
Collecting Django
Downloading Django-3.1-py3-none-any.whl (7.8 MB)
|████████████████████████████████| 7.8 MB 30 kB/s
Collecting sqlparse>=0.2.2
Downloading sqlparse-0.3.1-py2.py3-none-any.whl (40 kB)
|████████████████████████████████| 40 kB 10 kB/s
Collecting asgiref~=3.2.10
Downloading asgiref-3.2.10-py3-none-any.whl (19 kB)
Collecting pytz
Downloading pytz-2020.1-py2.py3-none-any.whl (510 kB)
|████████████████████████████████| 510 kB 8.2 kB/s
Installing collected packages: sqlparse, asgiref, pytz, Django
Successfully installed Django-3.1 asgiref-3.2.10 pytz-2020.1 sqlparse-0.3.1

There the download and installation process will begin.
You can check the installed version with the following command:
:~$ django-admin --version
3.1
3.- Configuring Django for the first use
Django is installed but before you can start making applications, you have to make a project. To do so, run this command:
:~$ sudo django-admin startproject example
Replace example with the name of your project.
Then, you have to make the first migration. This will load the default settings which is what we need to start using Django.
So, access the generated folder and start the migration:
:~$ sudo python3 manage.py migrate
perations to perform:
Apply all migrations: admin, auth, contenttypes, sessions
Running migrations:
Applying contenttypes.0001_initial… OK
Applying auth.0001_initial… OK
Applying admin.0001_initial… OK
Applying admin.0002_logentry_remove_auto_add… OK
Applying admin.0003_logentry_add_action_flag_choices… OK
Applying contenttypes.0002_remove_content_type_name… OK
Applying auth.0002_alter_permission_name_max_length… OK
Applying auth.0003_alter_user_email_max_length… OK
Applying auth.0004_alter_user_username_opts… OK
Applying auth.0005_alter_user_last_login_null… OK
Applying auth.0006_require_contenttypes_0002… OK
Applying auth.0007_alter_validators_add_error_messages… OK
Applying auth.0008_alter_user_username_max_length… OK
Applying auth.0009_alter_user_last_name_max_length… OK
Applying auth.0010_alter_group_name_max_length… OK
Applying auth.0011_update_proxy_permissions… OK
Applying auth.0012_alter_user_first_name_max_length… OK
Applying sessions.0001_initial… OK
Django is very versatile and therefore allows us to create an administrator account that will be able to make configurations from the framework’s web interface. So, create it with the following command:
:~$ sudo python3 manage.py createsuperuser
Username (leave blank to use 'root'): admin
Email address: [email protected]
Password:
Password (again):
The password is too similar to the email address.
This password is too short. It must contain at least 8 characters.
This password is too common.
Bypass password validation and create user anyway? [y/N]: y
Superuser created successfully.

There you will have to choose a username and password as well as an email. This one also tells you that you have to choose a strong password.
Now, it is necessary to make the project accessible. To do this, you must change a parameter in the project configuration file:
:~$ sudo nano example/settings.py
And modify the following parameter:
ALLOWED_HOSTS = ['COMPUTER_IP_WHICH_IS_RUNNING_DJANGO']

Save the changes and close the file.
Now serve the project in developer mode:
:~$ sudo python3 manage.py runserver 0.0.0:8000
Watching for file changes with StatReloader
Performing system checks…
System check identified no issues (0 silenced).
August 10, 2020 - 17:03:26
Django version 3.1, using settings 'example.settings'
Starting development server at http://0.0.0.0:8000/
Quit the server with CONTROL-C.

And now open your web browser and go to the computer where Django is installed. For example http://192.168.1.43:8000

With this, Django is correctly installed and ready for work.
You can also check the administration panel http://your-pc:8000/admin and you will see the login screen

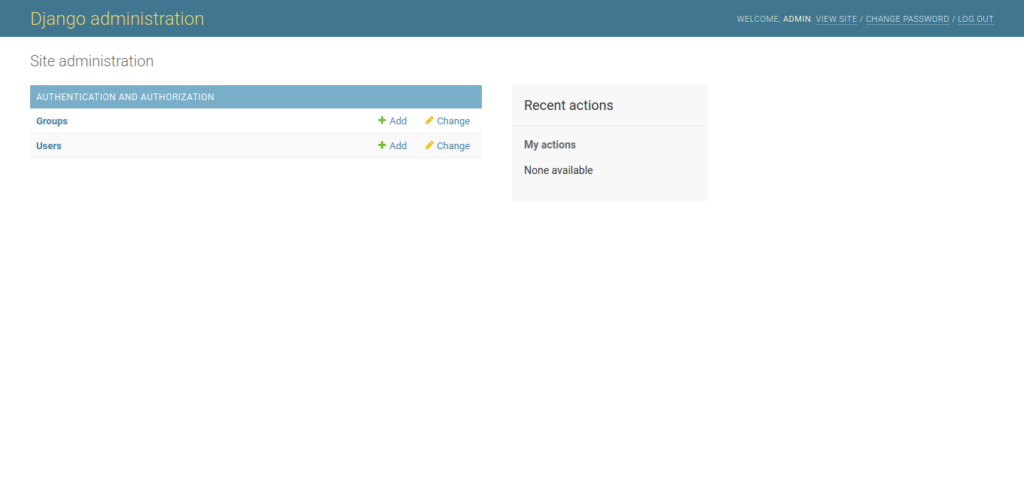
Enter the credentials of the administrator user you have created and you will access the configuration panel:

So, enjoy it.
Conclusion
Django is one of the most amazing web frameworks out there. It has all the potential of Python and this makes it easy to learn and accessible for many. And as you can see, it’s not hard to install it on Ubuntu 20.04.
So, share this post and join our telegram channel.


