Hello! No doubt the time we spend in front of the computer has increased considerably. Indeed, with the arrival of the COVID-19 pandemic, we users are staying at home a lot. Since the computer is used for personal, educational, and corporate activities. Therefore, it is normal to want to know the exact time the computer has been on. Whether it’s time to do something active or whether it’s time to take a break from the hardware. Please keep in mind that too much time on brings consequences. For example, the decrease in the useful life of hardware components. In addition, the increase in energy consumption. Well, in this post we’ll see how to check the Windows 10 uptime
How to view Windows 10 startup time using Task Manager
It is well known that the Windows Task Manager is key to controlling various aspects of the system. Well, we’ll use it to determine the startup time of Windows 10. In the first place you have to go to the task manager by pressing the combination Ctrl+Alt+Esc. Once there, please click on the Performance tab. Then scroll down to the left column and locate the CPU section.

How to see the Windows startup time from the network configuration.
With this mode, we will see the uptime of the network connector. However, it is well known that once Windows is activated, so does the network adapter. Consequently, Windows uptime will be the same as the network connection. With this mode, we will see the uptime of the network connector. However, it is well known that once Windows is activated, so does the network adapter. Consequently, Windows uptime will be the same as the network connection. With this in mind, press the Win+R combination and execute the following command:
ncpa.cpl

Once there, right click on the active connection to enter the Status.

In the Duration field, you can see the system uptime.

How to view the Windows 10 startup time using Command Prompt
The Windows command console is a useful tool to know system details. In the same way we can use it to know how long Windows has been on. With this in mind, simply launch it with administrator privileges and execute the following command:
systeminfo | find "System Boot Time"

As you can see, it shows the date and time since the computer is active.
How to see the computer’s power on time using PowerShell.
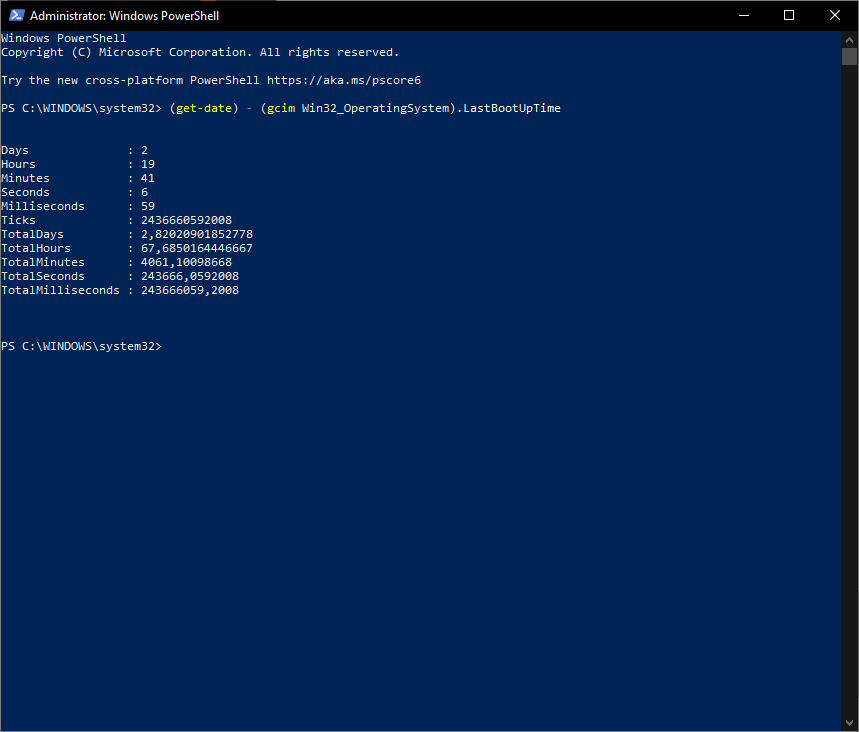
It is also possible to know these values using the PowerShell console. With this intention press the Win+X combination to launch it with administrator privileges.

Then execute the following command.
(get-date) – (gcim Win32_OperatingSystem).LastBootUpTime

The console will show the total time the computer has been on. In a very specific range, even in milliseconds.
Conclusion
At the end of the day, we’ve seen how to check the Windows 10 uptime. In addition, we explored different paths to show the result. Therefore, it is up to the user to choose which method suits him. So we hope that we have solved your doubts about this. I want to invite you to join our channel on Telegram. Please take a look at our post on how to schedule the shutdown of Windows 10. So long!


